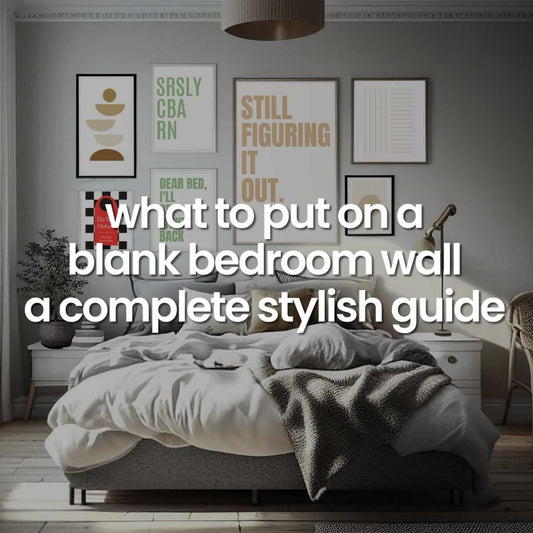
If you're looking to make a statement with a wall in any room, there's absolutely no doubt that a gallery wall is going to do it.
No matter if you have a big or small wall, you have 2 prints or have several, there's plenty of ways you can make a feature wall in any room.
Here's ideas on how to make a gallery wall, everything from sets of 2 prints to hanging 7 or even more prints.
Minimalist Grid Gallery Wall Ideas
Set Of 2 Prints - Gallery Wall

Just starting out? A set of 2 prints is a great way to go. Whether you're getting large prints or small, a pair of prints is a fantastic idea to get you going.
Choose 2 complimenting prints that go well together.
- Number of prints needed: 2
- Orientation: side by side or vertical
- Room: Suitable for any room
Set Of 3 Prints Gallery Wall

One better than 2, a set of 3 prints is really getting your gallery wall started. This is really easy to set up, with the most popular arrangement being 3 prints of the same size being placed side by side.
If you've got more vertical space than horizontal, staking up three prints is another way to go when it comes to this layout.
- Number of prints needed: 3
- Orientation: side by side or vertical
- Room: Suitable for any room
Set of 3 Prints - Multiple Sizes

This one could be called the squared set of 3 prints gallery wall. The idea is to use one large print and two smaller ones, with the 2 small prints stacked up and the large print to the side.
As you can see this gives off a squared kind of look, mixing up 2 different sizes of prints.
- Number of prints needed: 3
- Orientation: side by side and stacked
- Room: Suitable for any room
3x3 Grid Gallery Wall

If you've got a lot of art to display and not too much room, a 3x3 grid is the style to go for. You can display 9 prints in this format, choosing the best size which fits your space.
The 3x3 grid layout creates art in a square format, perfect for when you want to display a lot of art but don't have too much width or height to play with.
Ensure that all frames are the same size so the grid maintains it's size and shape, and looks symmetrical and clean.
- Number of prints needed: 9
- Orientation: Even grid spacing
- Room: Best in rooms with clear wall space
5 Art Piece Grid

When you've got 5 prints and want to make an impact, the 5 piece grid is a great way of displaying art.
This has one large focus piece in the centre, with four smaller pieces of artwork around it. This is one with two frames on one side, the main larger piece in the centre, and finally two frames on the other.
This orientation gives the main centre piece prominence and makes it stand out compared to the rest.
- Number of prints needed: 5
- Orientation: Horizontal
- Room: Works in any room
Vertical 5 Art Piece Grid

Having a lot of vertical space but not so much horizontal means you'll want to stack prints. If you've got 5 pieces of artwork, the vertical 5 piece grid works well.
This has 3 smaller prints stacked on top of each other, with 2 larger prints to their side. The larger prints take prominence, with 3 prints being complimentary to the layout.
- Number of prints needed: 5
- Orientation: Vertical
- Room: Works in any room
Horizontal Diamond Grid (4 prints)

Mixing up sizes in your wall art looks good if done right, and the horizontal diamond is one layout style which looks great.
Using 4 prints you can mix up small and large prints evenly, create a diamond pattern and make your wall a talking point.
This looks great in living rooms, dining rooms and kitchens alike.
- Number of prints needed: 4
- Orientation: Diamond
- Room: Works in any room
6 Prints Staggered Wall With Mixed Orientation

Not all prints have to be vertical, and the 6 prints staggered wall with mixed orientation is all about that.
Take a row of 3 prints, place a large print horizontal with the other two being in vertical positioning. Create another row below that in the opposite way, and you'll have a staggered gallery wall.
This layout works well when you have a large amount of horizontal space and want to create a big impact in any room.
- Number of prints needed: 6
- Orientation: Mixed horizontal and vertical
- Room: Works in any room
6 Prints Gallery Wall

For a more balanced looking gallery wall with 6 prints, this is the way to do it. You get 3 large prints and 3 smaller prints, and create a gallery wall that looks like this.
There's a centre point of 4 prints with one large and 3 small, with one of the smaller prints being horizontal. You finish this off with 2 large prints either side of this centre and here's what you end up with.
- Number of prints needed: 6
- Orientation: Mixed horizontal and vertical
- Room: Works in any room
7 Prints Gallery Wall

Having an odd number of prints might seem daunting to some, but for Veranito it's beautiful. We love asymmetry, and can make it look incredible on your wall.
a 7 print gallery is exactly that. We love to style this with 4 vertical prints in a row, with 3 smaller prints below.
The key to making this look good is to have the middle print in a horizontal orientation, and have good spacing which turns the gallery wall into something that may look odd to something that looks spectacular.
- Number of prints needed: 7
- Orientation: Horizontal
- Room: Works best in hallway, dining or living room
Ascending Staircase Gallery Wall

Perfect for going up and down stairs or if you want to create that effect, the ascending staircase layout is brilliant for your gallery wall.
This can be done with any number of prints, but works best with 4 - 6 prints.
The idea of this layout is the prints go up and up as in a staircase. It can be done on the walls in any room, but using this layout in the hallway on a staircase is where it works best.
- Number of prints needed: 4 - 6
- Orientation: Vertical
- Room: Works best in hallway, on stairs or in small spaces
Gallery Wall Art Tips
- Sizing is important - Make sure you select the right size artwork for your space so it fits in with your room
- Choose the right colours - You'll want colours of artwork that go well together
- Choose a theme - Don't just place random pieces of art on the wall. Pick a theme and stick to it.
- Spacing - Ensure you have enough space, not only for the prints, but the space around them. Art needs to be able to breathe.
- Framing - Frames are important, so choose the right frames for your gallery. Usually this will mean the same style frame for every piece in the gallery to ensure it's uniformed.
And there you have it, plenty of ideas on how to make a gallery wall in your house. These layout ideas and tips on arranging your prints are a great start to choosing how to display your wall art in your home.


